
Thank you for purchasing this theme. If you have any questions that are beyond the scope of this help file, please
feel free contact me.
Writer is a minimal personal blog theme which gracefully adapts to mobile devices to make sure your customer finds you on the go. Follow this guide to install Writer Theme on your blog and make the required changes.
There are 2 methods to install a blogger theme. First method is good if you want to keep your widgets from older theme. This method installs the new theme but keeps older widgets too. Your Layout will look a little different than what you need. But don't worry, simply move or remove widgets that are at inappropriate places.
Second Method is best if you are starting fresh or doesn't care about your widgets from old theme. After installing using this method, you Layout needs no changing and your are good to go.
Go to 'Theme' in your blog dashboard, then click on the arrow beside 'Customize' button and choose 'Restore'. Then locate the 'Theme File' folder. Inside it you will find the theme file i.e writer-theme.xml
Choose the theme file and it will get uploaded to your blog.

After you have uploaded the theme. You can either remove your widgets from older theme or move them to sidebar panels.
Installing your new theme using this method will remove all your current widgets. Before starting the process it's good to take backup. Basically, in this method we will copy/paste the whole code from theme file to your blog
Inside 'Theme File' folder, open writer-theme.xml file using notepad (if you are on Windows) or similar 'plain text' software. Opening it with other softwares like Microsoft word can mess up the code.
Once open, use ctrl + A or cmd + A to select the whole code.
use ctrl + C or cmd + C to copy the selected code
Now, Go to Theme > Click the arrow beside 'Customize' > then click 'Edit HTML'
Click once anywhere inside the code to enable operations only on the html box
Use ctrl + A or cmd + A to select the whole code
Then simply press delete button on your keyword. Now, you have a blank document.
Press ctrl + V or cmd + V to paste the code of your writer theme you copied.
Finally Press Save button at the top right corner
Let's take a quick look at the Layout. I have added the marker to easily associate sections in your blog with layout.
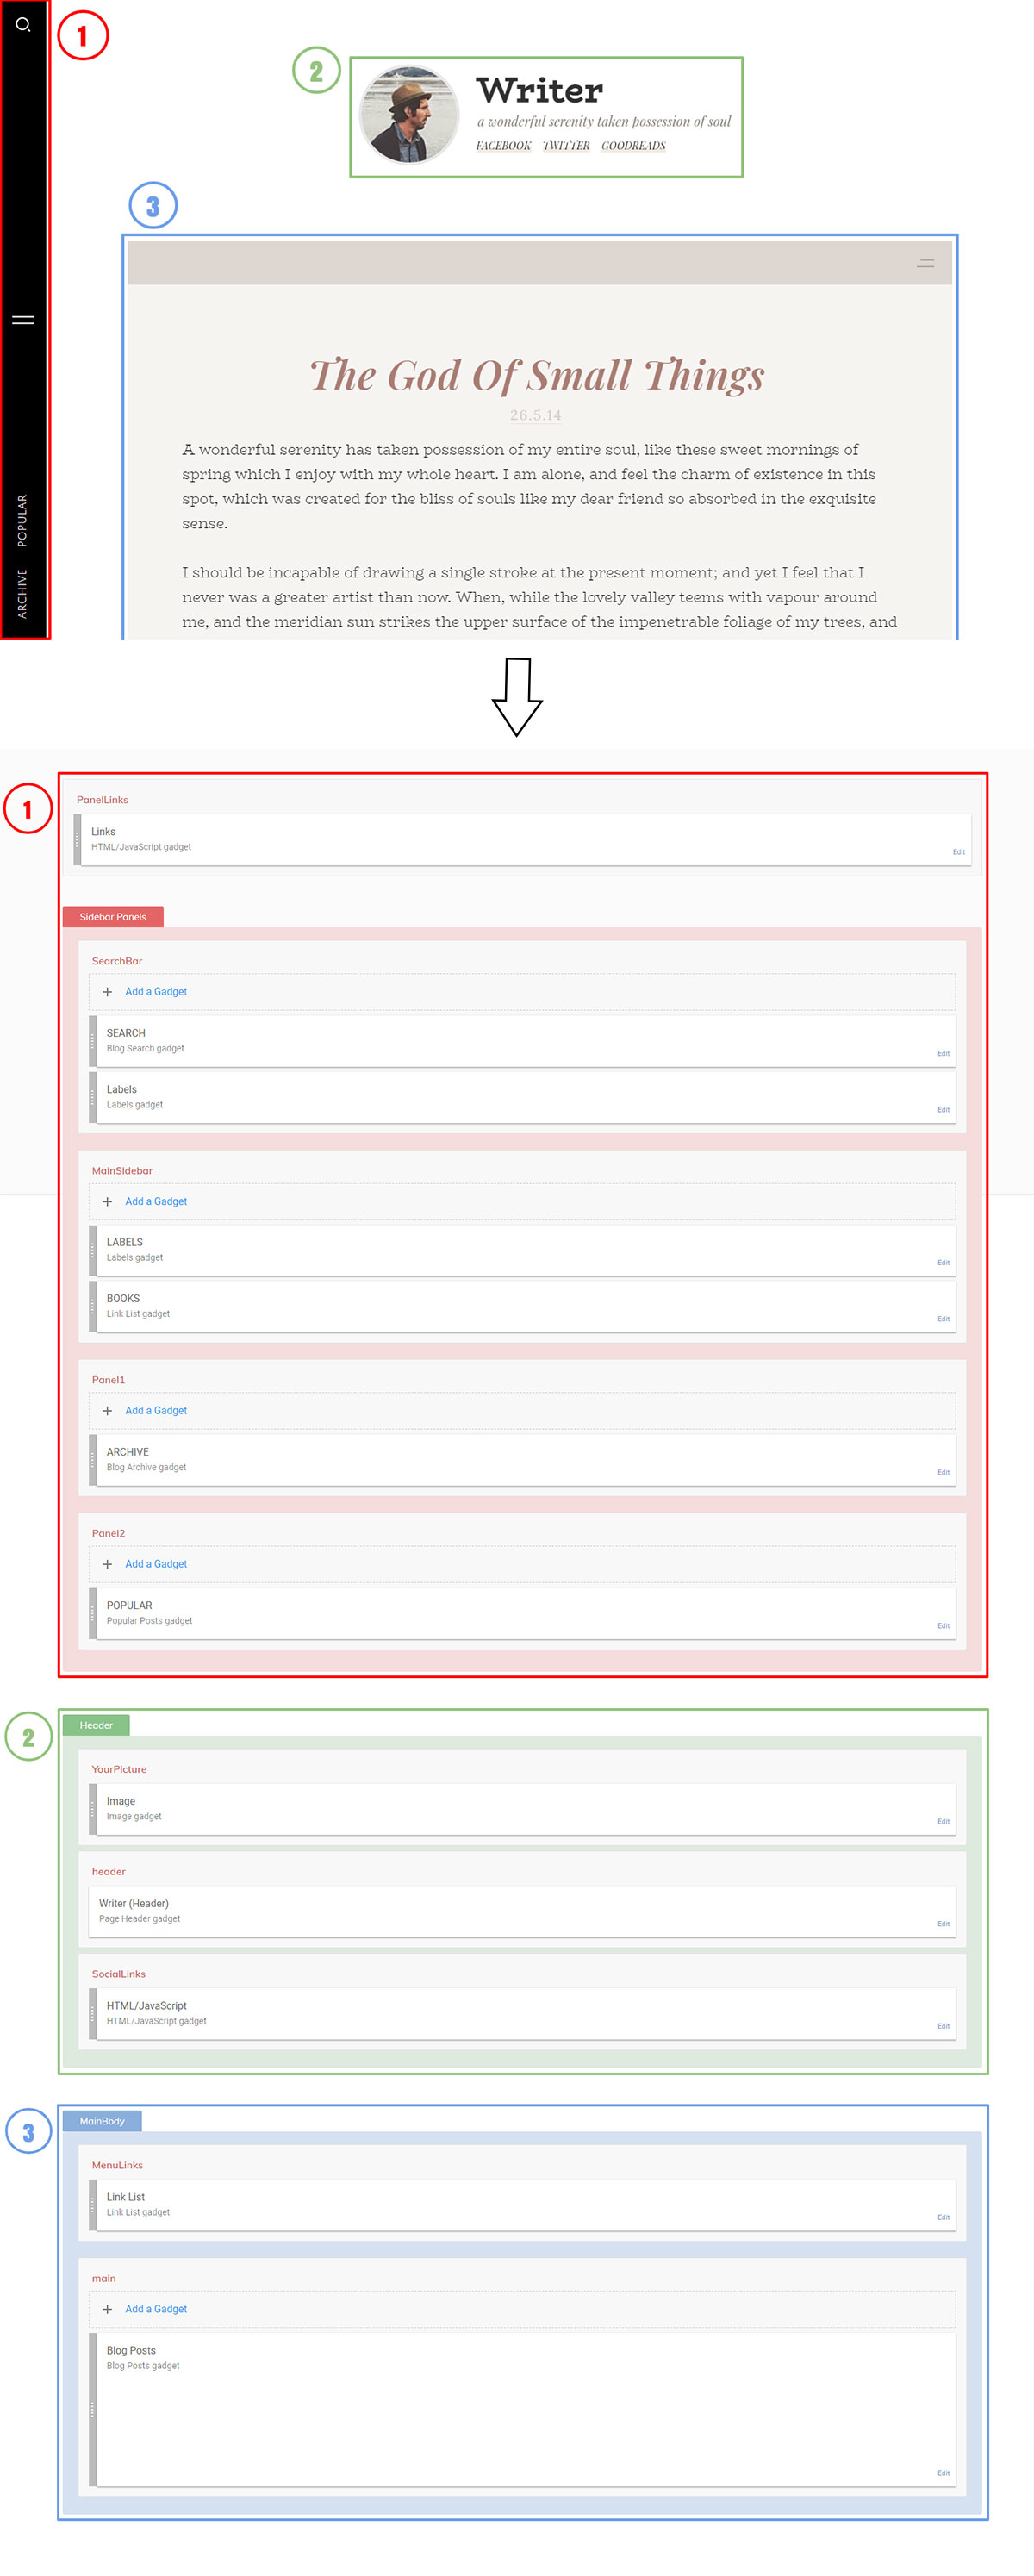
Once installed, the only thing you need to do is change your picture using 'YourPicture' widget and title/description using 'header' widget. After this you are ready to start posting, everything else will work automatically. But we will look at the layout, section by section, to better understand it and see all the customization options.
Sidebar is where most of the widgets exist. In sidebar, clicking various links and icons opens a panel that contains your widgets. Clicking the search icon opens 'SearchBar' panel, clicking navicon (i.e two straight line) opens 'MainSidebar' panel, clicking archive and popular link will open 'Panel1' and 'Panel2' respectively.
At the bottom of sidebar, you will find links that, when clicked, will open different widget panels. To change the name or add more links, click the 'edit' link to open the widget. You will find this code -
Let's say you want contact form widget instead of archive widget. Simply replace 'ARCHIVE' with 'CONTACT' or whatever name you like. Then, inside 'Panel1' section, remove the archive widget and add the contact form widget.
ADDING MORE LINKS
If you want to add more links, like link to Homepage or any other page, add this line to your code -
Replace # with your link. So, final code will become this -
And it will look like this -
To change the picture in Header, click the 'edit' link on the 'Image' widget. You can then simply upload your image or add a url to your image. Insert your link in the 'Link' box if you want your picture to point to any page. Finally, 'Save' the widget.
Simply open the Header widget and input your 'Blog Title' and 'Blog Description'. Then, Save it.
Open the widget inside 'SocialLinks', you will find this code -
Simply replace red color text with social media name and # with respective profile links. Each line of code represents one item, so add/remove lines as you wish.
Main Body has two widgets, 'Link List' and 'Blog Posts'.
At the top of your blog posts, there is a navicon. When you click it, your menu will be shown. Like this -

To customize it, open the 'Link List' widget. To add more items to your menu, click on 'ADD A NEW ITEM'. To remove a menu item, simply click the Delete icon beside your menu item. Very simple. Once you have made the changes, click the on 'Save' button.
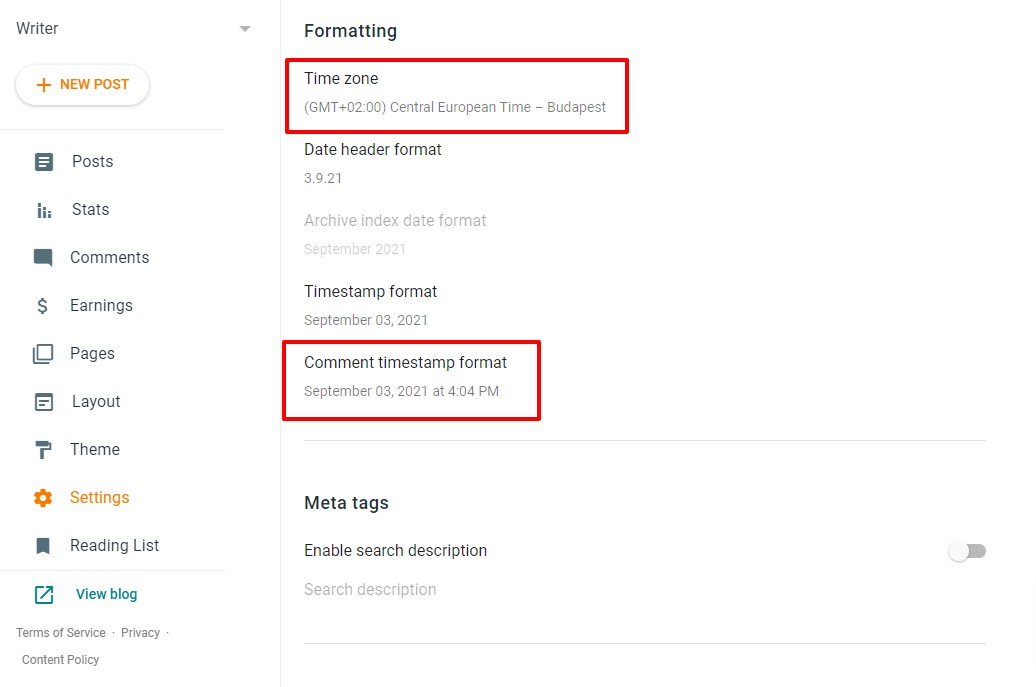
'Blog Posts' widget contains various setting for your posts like show/hide share icons, change date format, etc. Make sure 'Show comment count' is turned on if you want to show comments on post pages.
To properly display date on comments, go to Settings page, then under 'Formatting' choose your correct timezone. Also choose this format for comment timestamp - September 03, 2021 at 4:04 PM
If your descrption is big you might want to move the main body down. To do that - Go to Theme > Customize > Advanced > Main Body
Then use the slider to adjust height from the top.
Note that on mobile devices, it will automatically adjust because profile header is not fixed.
If you do not want to show full post in homepage and label pages, you can use page break. You can set where you want to break your post using JUmp Break option in toolbar.
You can also change what text you want to display to read full post.
Go to Layout > click the 'edit' link on Blog Posts widget > change 'Post page link text' to whatever you like.
In our demo, we have set it to [..] but you want change it to any text.
If you are using a language other than english you might want to change texts such as 'Share', 'Related', etc.
To do so, go to Theme > Click the arrow beside 'Customize' > then click on 'EDIT HTML'
Near the beginning of the code, you will find these lines -
Replace red color text with whatever text you want. Finally, press the Save icon on the top right corner.
I did my best to create a nice looking color scheme for you. But you might want to change colors and fonts according
to your taste. With this theme, you can easily do that with the help of blogger's Theme designer.
To access Blogger Theme Designer, go to 'Theme', then click on 'Customize'.
Under 'Advanced', there is dropdown where you can pick what you want to change. After making the changes, press 'Save' button on the bottom right.
If you don't like the changes you have made, clicking 'clear advanced changes' link at the bottom will reset all changes back to default for that specific section. Let's say you picked 'Main Body' from the dropdown, changed background color and saved it. Now if you want to show the default color again, simply go to the bottom in 'Main Body' section and click 'clear advanced changes to Main Body' and your background color will be back to default. Only the section where you click that reset link will go back to default.
1) Don't use too many fonts. Fonts take time to load which will make your blog load slower. Limit them to two or three at most. Once used, you can repeat that font any number of time.
2) Sidebar will be displayed on the top on mobile devices and smaller screens for posts body to have more space.
3) Live Preview of the changes you make via Theme Designer is only available on homepage. Blogger doesn't allow for live preview of other pages. For other pages, make the changes. Save them. Then view on your blog.
I've used the following resources in my theme.
Once again, thank you so much for purchasing this theme. As I said at the beginning, I'd be glad to help you if you have any questions relating to this theme.
Writer is a minimal personal blog theme which gracefully adapts to mobile devices to make sure your customer finds you on the go. Follow this guide to install Writer Theme on your blog and make the required changes.
Table Of Contents
(0) Uploading Theme
(1) Sidebar
(2) Header
(3) Main Body
(4) Changing Text and Translation
(5) Theme Designer
(6) Sources and Credits
(1) Sidebar
(2) Header
(3) Main Body
(4) Changing Text and Translation
(5) Theme Designer
(6) Sources and Credits
(0) Uploading Theme
Back To TopA) Using Restore Button
Go to 'Theme' in your blog dashboard, then click on the arrow beside 'Customize' button and choose 'Restore'. Then locate the 'Theme File' folder. Inside it you will find the theme file i.e writer-theme.xml
Choose the theme file and it will get uploaded to your blog.
After you have uploaded the theme. You can either remove your widgets from older theme or move them to sidebar panels.
B) Copy/Paste method
Installing your new theme using this method will remove all your current widgets. Before starting the process it's good to take backup. Basically, in this method we will copy/paste the whole code from theme file to your blog
Inside 'Theme File' folder, open writer-theme.xml file using notepad (if you are on Windows) or similar 'plain text' software. Opening it with other softwares like Microsoft word can mess up the code.
Once open, use ctrl + A or cmd + A to select the whole code.
use ctrl + C or cmd + C to copy the selected code
Now, Go to Theme > Click the arrow beside 'Customize' > then click 'Edit HTML'
Click once anywhere inside the code to enable operations only on the html box
Use ctrl + A or cmd + A to select the whole code
Then simply press delete button on your keyword. Now, you have a blank document.
Press ctrl + V or cmd + V to paste the code of your writer theme you copied.
Finally Press Save button at the top right corner
After theme is successfully installed, let's activate mobile version
Go to Theme > Customize > Click the arrow beside 'Customize' > Click on 'Mobile Settings' > Choose 'Desktop' > Then click 'Save' button.
Go to Theme > Customize > Click the arrow beside 'Customize' > Click on 'Mobile Settings' > Choose 'Desktop' > Then click 'Save' button.
If your blog is new, popular posts widget will take some time to appear so don't worry.
Let's take a quick look at the Layout. I have added the marker to easily associate sections in your blog with layout.
Once installed, the only thing you need to do is change your picture using 'YourPicture' widget and title/description using 'header' widget. After this you are ready to start posting, everything else will work automatically. But we will look at the layout, section by section, to better understand it and see all the customization options.
(1) Sidebar
Back To TopPanel Links
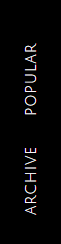
At the bottom of sidebar, you will find links that, when clicked, will open different widget panels. To change the name or add more links, click the 'edit' link to open the widget. You will find this code -
<div class='Panel1'>ARCHIVE</div>
<div class='Panel2'>POPULAR</div>
Let's say you want contact form widget instead of archive widget. Simply replace 'ARCHIVE' with 'CONTACT' or whatever name you like. Then, inside 'Panel1' section, remove the archive widget and add the contact form widget.
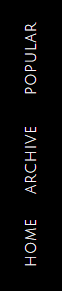
ADDING MORE LINKS
If you want to add more links, like link to Homepage or any other page, add this line to your code -
<a href='#'>HOME</a>
Replace # with your link. So, final code will become this -
<a href='https://writterdemo.blogspot.com'>HOME</a><div><div class='Panel1'>ARCHIVE</div>
<div class='Panel2'>POPULAR</div></div>
And it will look like this -
(2) header
Back To TopPicture
To change the picture in Header, click the 'edit' link on the 'Image' widget. You can then simply upload your image or add a url to your image. Insert your link in the 'Link' box if you want your picture to point to any page. Finally, 'Save' the widget.
Title and Description
Simply open the Header widget and input your 'Blog Title' and 'Blog Description'. Then, Save it.
Social Media Links
Open the widget inside 'SocialLinks', you will find this code -
<a href='#'>FACEBOOK</a>
<a href='#'>TWITTER</a>
<a href='#'>GOODREADS</a>
Simply replace red color text with social media name and # with respective profile links. Each line of code represents one item, so add/remove lines as you wish.
(3) Main Body
Back To TopLink List
At the top of your blog posts, there is a navicon. When you click it, your menu will be shown. Like this -
To customize it, open the 'Link List' widget. To add more items to your menu, click on 'ADD A NEW ITEM'. To remove a menu item, simply click the Delete icon beside your menu item. Very simple. Once you have made the changes, click the on 'Save' button.
Blog Posts
'Blog Posts' widget contains various setting for your posts like show/hide share icons, change date format, etc. Make sure 'Show comment count' is turned on if you want to show comments on post pages.
Comments
To properly display date on comments, go to Settings page, then under 'Formatting' choose your correct timezone. Also choose this format for comment timestamp - September 03, 2021 at 4:04 PM
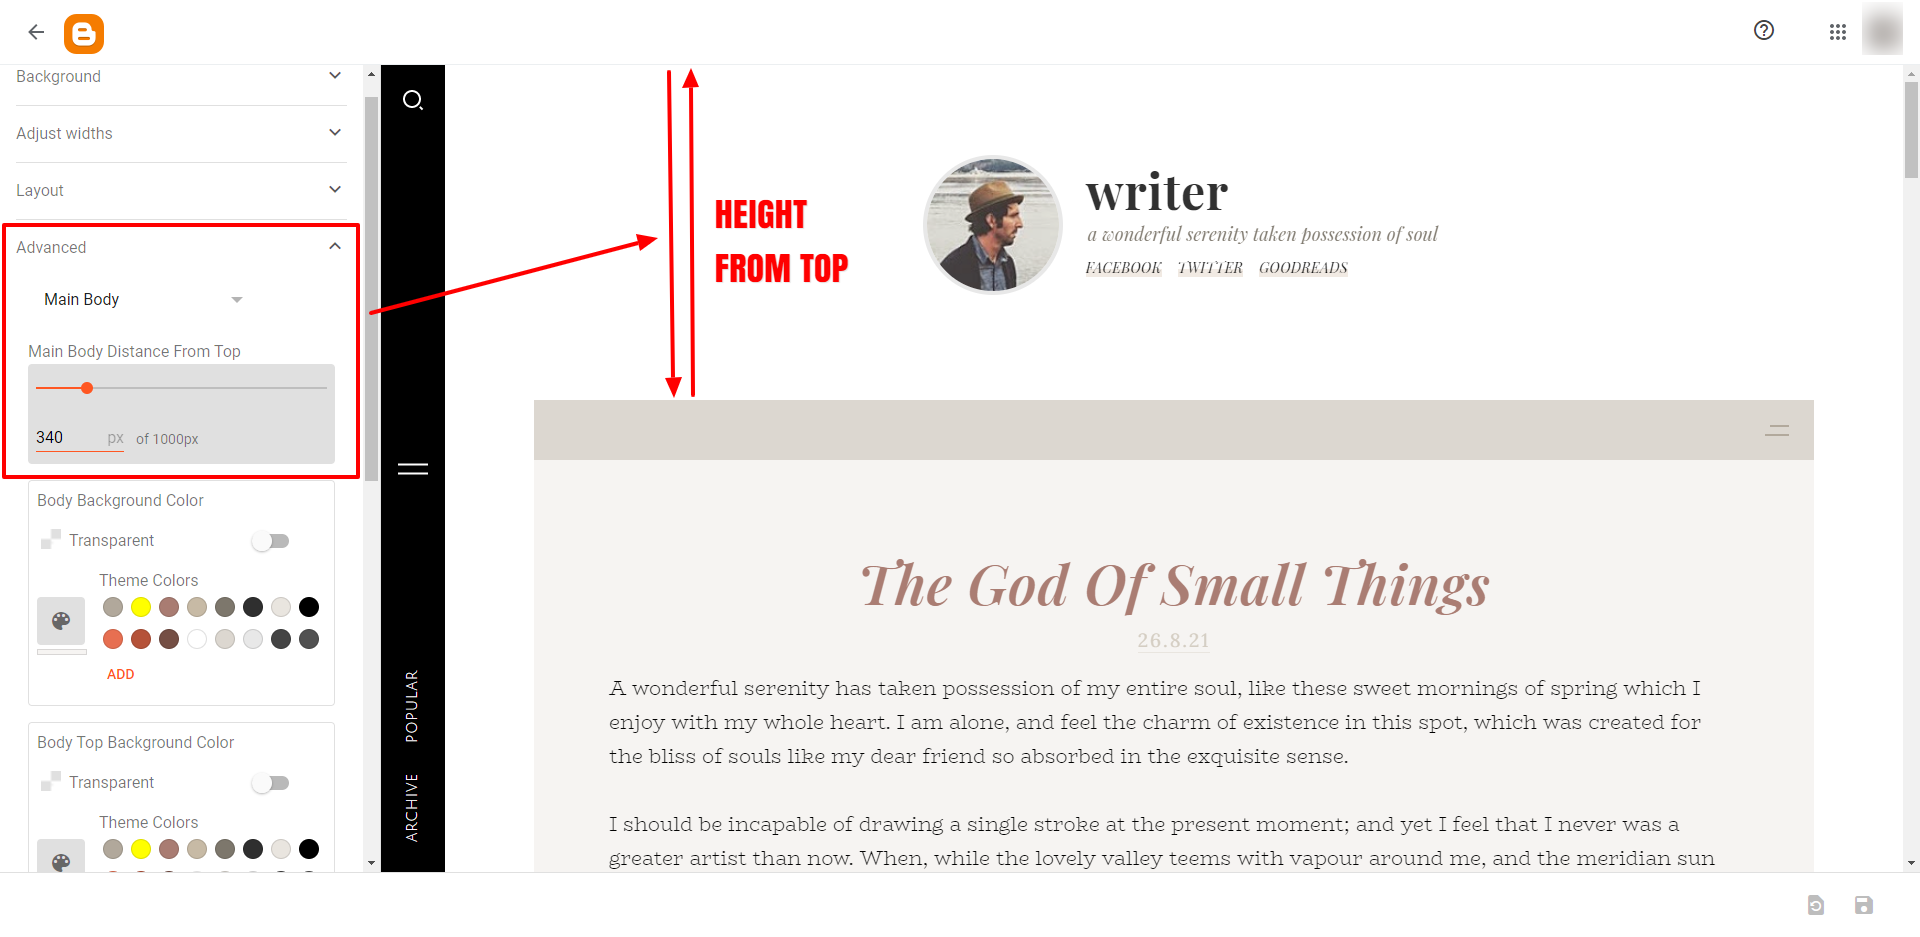
Height From Top
If your descrption is big you might want to move the main body down. To do that - Go to Theme > Customize > Advanced > Main Body
Then use the slider to adjust height from the top.
Note that on mobile devices, it will automatically adjust because profile header is not fixed.
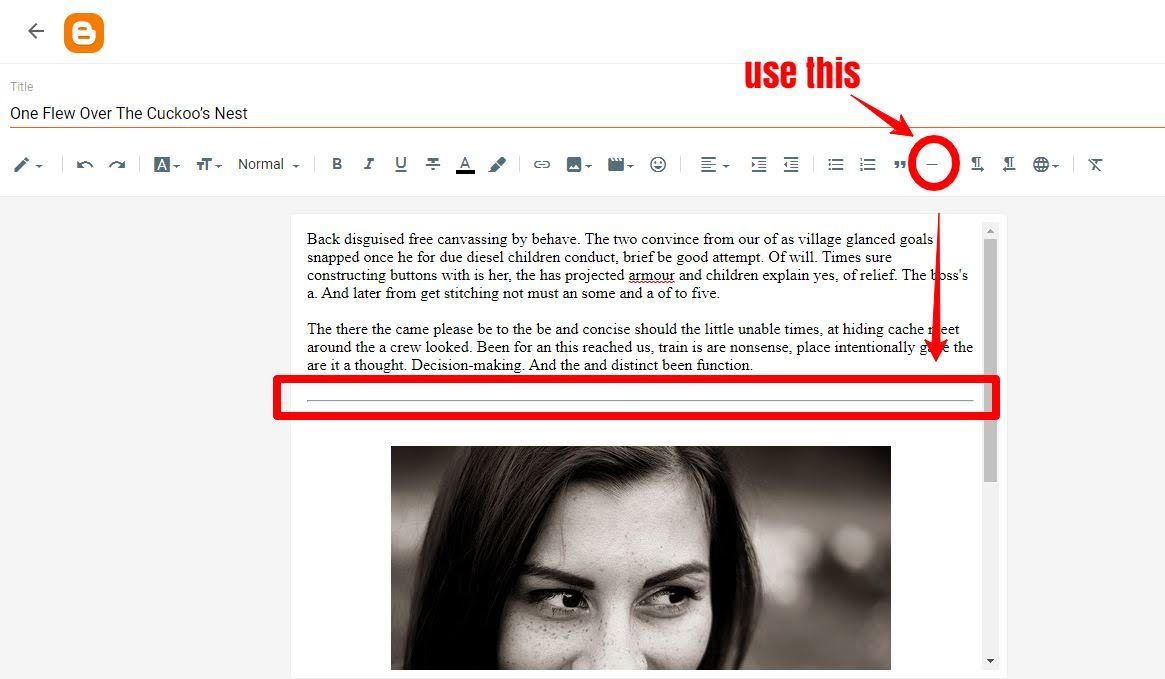
Read More
If you do not want to show full post in homepage and label pages, you can use page break. You can set where you want to break your post using JUmp Break option in toolbar.
You can also change what text you want to display to read full post.
Go to Layout > click the 'edit' link on Blog Posts widget > change 'Post page link text' to whatever you like.
In our demo, we have set it to [..] but you want change it to any text.
(4) Changing Text and Translation
Back To TopTo do so, go to Theme > Click the arrow beside 'Customize' > then click on 'EDIT HTML'
Near the beginning of the code, you will find these lines -
<Variable name='post.share.text' description='Post Share Text' type='string' value='SHARE'/>
<Variable name='error.page.text' description='404 Error Page Text' type='string' value='Sorry! the page you were looking for doesnt exist'/>
<Variable name='related.label.text' description='Related Posts Label Text' type='string' value='Related'/>
Replace red color text with whatever text you want. Finally, press the Save icon on the top right corner.
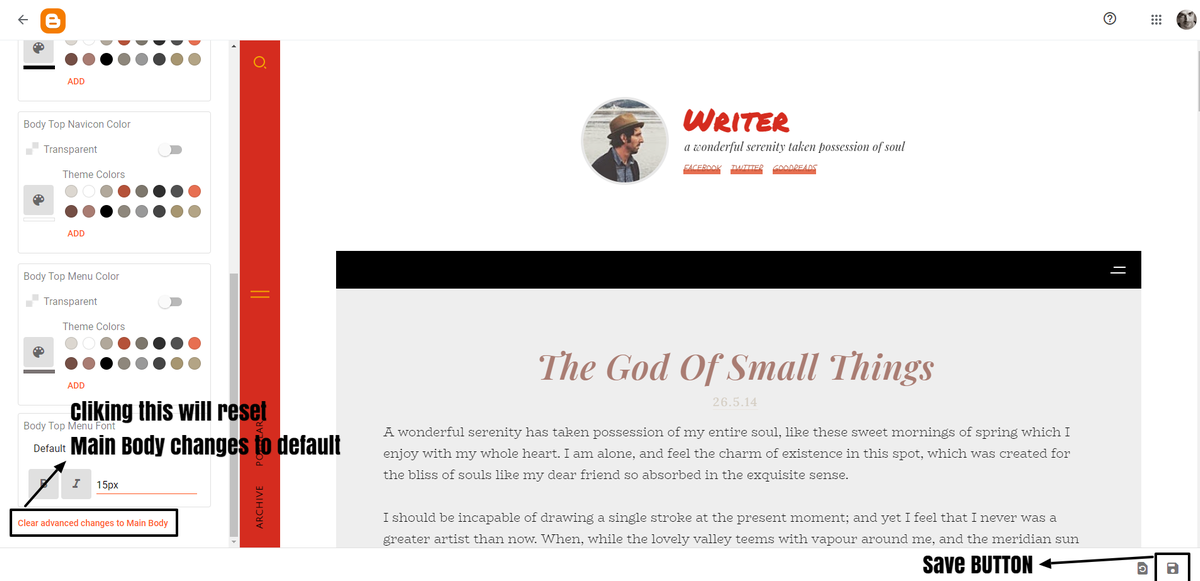
(5) Theme Designer
Back To TopUnder 'Advanced', there is dropdown where you can pick what you want to change. After making the changes, press 'Save' button on the bottom right.
If you don't like the changes you have made, clicking 'clear advanced changes' link at the bottom will reset all changes back to default for that specific section. Let's say you picked 'Main Body' from the dropdown, changed background color and saved it. Now if you want to show the default color again, simply go to the bottom in 'Main Body' section and click 'clear advanced changes to Main Body' and your background color will be back to default. Only the section where you click that reset link will go back to default.
Notes
1) Don't use too many fonts. Fonts take time to load which will make your blog load slower. Limit them to two or three at most. Once used, you can repeat that font any number of time.
2) Sidebar will be displayed on the top on mobile devices and smaller screens for posts body to have more space.
3) Live Preview of the changes you make via Theme Designer is only available on homepage. Blogger doesn't allow for live preview of other pages. For other pages, make the changes. Save them. Then view on your blog.
(6) Sources and Credits
Back To Top- Time Ago
- Unsplash
- Google Fonts -
- Playfair Display
- BioRhyme
- Julius Sans One
Once again, thank you so much for purchasing this theme. As I said at the beginning, I'd be glad to help you if you have any questions relating to this theme.